Thursday 5 December 2013

Painting Up

With walls and floors removed and all the wiring out of the way, it was time to start painting up the interior. While we'd started with the idea of individual décor in each room - the way a real house would be - a few words of caution from my sister gave us pause for thought, and the current plan is to paint all the rooms white for the time being.

That certainly cut down the time it took to get all the rooms painted, since we didn't have to channel our inner four-year-old to pick colours for the rooms. The first coat in most rooms was a joint effort between my mother and me, but the second coat - after a round of sanding to smooth out some of the blobby bits - was all my mother's work.

Something that became apparent during the painting was that much of the hardboard must have been recycled because it's riddled with nail holes which needed filling. What was interesting about the painting was that, while the paint liked to fill the holes that had been drilled for the ceiling light fittings, it never did quite such a good job with the nail holes - they ended up with some Polyfilla spread over them.

It's quite amazing what a coat of simple white paint does for the interior... Not only does it look brand new, but it's brighter (even compared to when it was papered inside) and possibly looks larger. This effect should be enhanced when the window holes are enlarged for the new window frames...
Front of house - rear walls removed (so the top right room
needn't have had the rear wall painted)
Back of house. The top right room is currently planned
to be the bathroom, and the bottom right room as the kitchen
The landing and the handrail around the top of the staircase
In the original dolls' house, all the carpeting was made using dressmaking fabric, but none of it was ever fastened down. These days, there are many more options available for floor (and wall) coverings, and my mother ordered a small sampling, including molded and painted plastic 'tile' effects for the bathroom/kitchen and several different colours of sticky-backed foamy 'carpet'

Since it's difficult to know how these sorts of things will look in situ, I took the above photos of all of the samples in order to do a quick, rough Photoshop job on the front of the house. This isn't an example of how the finished house is going to look (for one thing, the bathroom will be at the back of the house, not the front), but it was enough to convince my mother that she wanted the whole bathroom 'tiled', not just the floor. The kitchen will likely only have a tiled floor, but that remains to be decided.

Along with the carpet samples, my mother ordered a strip of the yellow carpet for the stairs. This was the first piece of carpet to be installed, though it needs a bit of trimming to fit it around the handrail posts at the top and bottom of the stairs.

I've been saying all along that the dolls' house is going to look fantastic once it's finished but, even at this early stage, one can begin to see its potential. The only worry we have about the décor stems from my sister's concerns that her daughter may be at the stage where she'll scribble on anything (because that's apparently what one of her schoolfriends does)... but based on my experience of the precocious young 'un, she tends to scribble on paper more than objects (and it tends to be only paper she's been given for the purpose rather than random scraps), though I have to admit I don't see her often enough to be certain that my experience counts for much.

Wednesday 4 December 2013

One Door Installed, But...

After much discussion on the relative merits of cutting down the wooden doors my mother bought months ago, versus building new doors to the required size, based on the design of those doors, my father eventually - somewhat reluctantly - cut down the existing doors, removing the shorter, topmost sections and refitting them within a truncated frame.

Some of the cutting wasn't perfectly even, leaving a subtle gap in the frame on one side, but a touch of Polyfilla and coat of paint will cover that up well enough.

Just for fun, though, the front door - pictured above - has been fitted to the larger of the two rear panels of the dolls' house and, because the rooms are not consistently sized, these panels cannot be simply switched from front to back. In the photo, the panel is about 1.5" inset from the left hand side of the house in order to give the impression of where the front door would be, had it been fitted to the correct panel.

When last I checked, we still weren't entirely decided on what would be done about the 'true' front door, since the only ornate door frame we purchased is glued firmly in as the back door... but at least we can begin to see how good the finished house will look.

Also, that window above the door looks awesome, and demonstrates the height all the other window frames will be, once all the alterations are done. The remaining frames aren't going to be as detailed, since we needed eighteen in total(!) but all of them will have thin plastic sheeting glued on as the 'windows'.

Stripped & Bared

I've been a bit lax with this blog (and all the others, frankly), so this is the first part of a big catch up which should bring us as up-to-date as possible, until I next visit my folks...

One important part of this update is the news from my sister that she was hoping to give this to her daughter as a Christmas present. This year. That's a bit of a blow, as the rest of us were hoping for a little longer so the work (and cost) could be spread out more gradually. It also means this blog could end up being substantially shorter unless, once the dolls' house is complete, my sister picks it up and writes about her memories of playing with it 30-odd years ago and/or how her daughter gets on with it. That could go on for another few years but, unless we miss the deadline, the refurb has only a couple more weeks to go.

Still... Plenty to add for the moment, starting with the last of the stripping and making ready and the first bits of painting and decorating.

With the exterior fully stripped, it was time to move onto the interior... where it all gets a bit fiddly. The papered parts of the walls are slightly inset versus the framework so, while the paper was peeling in some places, getting it all off evenly was quite tricky. On the upside, the back walls of the rooms on the front of the house were screwed in place so they could be removed to access wiring, making the stripping of those surfaces far easier. The back walls of the rooms at the rear of the house were glued in place, like the ground floor's ceilings, leaving cavities of a few millimetres through which all the wiring could run. The switches sit in small indentations in the hardboard, allowing them to be pushed through far enough that they can be fixed in place by the nuts they were supplied with.

The rooms aren't perfectly consistent in their construction, though it was still considered wise to label the removable floors and walls, as well as the front and back of the house, to ensure everything goes back in its correct place.

Of course, things don't always work out that way... but more on that in a later post...


Removing the back wall panels from the front rooms allowed us to see the wiring for the first time in about thirty years, giving us a better idea of how it all came together in the first place. Chances are, like the fresh batch of ceiling lights we bought, the originals came with little 2-pin plugs for their power, but they ended up fully wired in, via the individual switches in the back walls of most rooms, and the ceilings of the hall, landing and through lounge.

Like the back walls panels from the front of the house, the upstairs floors were screwed down, and came out easily enough. This revealed how most wires from all over the house were fed through to the loft on one side, via a hole drilled in one of the pieces of framework. The wiring was kept loose and fairly slack, rather than trying to fit it precisely to the walls. Each wire from a ceiling light looped down the back wall to its switch, then back up to the loft where they were connected into a screw terminal block, which then led down to the bottom of the house, out under the base to a transformer and, from there, to the mains.

I asked my father if he had any circuit diagrams for the wiring of the dolls house, or if it was done on-the-fly. After answering very emphatically that it was done on-the-fly, he muttered "diagrams..." in a somewhat incredulous tone. With my father, it seems, proper preparation does not necessitate painstakingly logging every step of the process...

There's one internal wall surface in the third photo, above, which seems to show signs of burning at one of the wire joints. While this has been painted over now, it wasn't noticeable after the original wiring was removed, and the wiring itself shows no sign of having burnt, so I guess it was just a trick of the flash. One light had stopped working, but no-one can quite remember which room it had been in.

After these photos were taken, all the wiring was removed and set aside, and work began on painting the interior...

Monday 7 October 2013

Stripping Down

Not much to report right now, but the remaining paper is gradually being stripped from the outside of the house, so I'd imagine the interior won't be far behind.

One interesting thing to note in these photos is that my father's markings for the doors and windows - made in pencil about 30 years ago - are still very much visible. I guess, in part, that'd be because the paper was glued on in such a strange way - curls and whirls of glue, rather than a thin, consistent coat.

I'm not entirely sure why the windows are so much higher than the doors (and, stupidly, neglected to ask... so expect an update when I remember to do so!) but, assuming we're using the ready-made bits we've picked up, or making something to a vaguely similar scale, they may line up better once the refurb is complete.

The obvious advantage to the shop-bought windows is that, being larger, they'll let far more ambient light into the house, so the electric lights won't be quite so necessary when the house is closed up during daylight hours.

Saturday 21 September 2013

Random Furnishings

During my last visit to my folks, we'd discussed an expedition into the Dark Unknown of the loft, in search of the furniture that had once occupied the rooms of the dolls house. When next I spoke to them on the phone, my mother had already been up in the loft and had retrieved the majority of the furniture in a couple of old ice cream tubs.

Aside from some of it being a bit dusty and dirty due to long storage in what seems to have been open containers, most of the stuff is in pretty good condition... but it's not exactly consistent. We have plastic items bought in shops, wooden items bought in other shops, some decent-looking 'upholstered' furniture, some lovingly hand-made stuff from one of the grandmothers, and some seriously cheap-looking plastic crap...
The bathroom suite, a strange 'chocolate and caramel' colourscheme, just had
to be seen 'in situ' to fully reveal its true horror. There was even a toilet roll
holder and little plastic cylinder wrapped in paper masquerading as the bog roll.
This is decent quality stuff... though the toilet lid and seat are a bit floppy.
Interesting features of this kitchen furniture: the tap on the sink is made of
metal and joins the worktop with a ball joint, so it can be very freely moved.
The washing machine has a geared drum - rotate the wheel on the side
(just about visible on the far left of the photo) and the drum will turn.
The oven... opens..? Not much of interest in there, to be honest.
The TV is an interesting bit of kit... The bulk of it is a hollowed out  block of
wood, with the front, back and stand made of plastic. The picture is a print
on paper which was lit by a tiny bulb passed through the back. Unfortunately
it was only held in place by sellotape, which had dried up and fallen off.
We did find the cable, plug and bulb, though, so we're going to 'upgrade' it.
Here we have the terribly crappy, cheap plastic furniture that really doesn't fit the
rest if the stuff we have... I mean, the wardrobe has drawers, certainly (one is missing!)
but the doors are solid, and it's hollow at the back! The bunk beds don't exactly
leave much headroom for the lower bunk, either...
A mixture of the wooden furniture, some of it more impressive than the rest.
Some of the drawers open, while others are fixed. The sideboard, for example
is all glued together. Interestingly, the book rack on top of it is filled with
tiny books which one can flick through. There's no print, obviously, but
it's a cool feature for a dolls' house nonetheless.
The 'upholstered' lounge suite has seen better days - compression in storage
means the cushions are at odd angles.
And, good grief, there was even a piano! The lid was once attached by a
rubber band, but that has long since perished and crumbled away. Might
be difficult to replace, too, since it was glued into place underneath a
of bits of wood on the interior. It's also lost its pedals but, in all other
respects, its in fairly good condition.
And in this cute little cot rests a little plastic baby, wrapped in (and glued into)
a little night dress. The face has become squashed and distorted (or maybe
it was always like that?) so it looks particularly ugly.
This bed and the duvet were hand-made by one of the grandmothers.
The duvet is perhaps a little large, but it was hand-knitted with some very
nice wool, and is in excellent condition. The bed is slightly warped, but still
looks pretty good... and, as you can see, it fits the existing figures well.
Along with this rather random treasure trove of proper furniture, there were all kinds of odd little plastic bits from the kitchen, a small miscellany of china and metal pots, kettles, vases, etc... and a truly bizarre selection of 'pets' - two china dogs, some (plastic?) cats made in varying degrees of realism, a couple of wooden mice, and even a plastic squirrel that had once been a pencil top.

We also found the whole family who had once 'lived' there, but I shall spare you photos of those, gentle reader... Naturally they're a little worse for age and wear, but they're also just plain weird. The 'parents' have gangly, barely humanoid bodies with large heads and tiny, chubby hands. The 'kids' don't scale very well, possibly because they came from different lines of dolls' house people, and they're painted in a rather disturbing way.

I'm not sure how much of this existing furniture - if any - will survive this refurbishment. I know we're going to try to fix up the TV and give it a new picture, and some of the stuff is in a good enough condition... but it might be more interesting to minimise the furniture and see how the niece wants to fill the place up.

Friday 13 September 2013

And so, the work begins...

Having heard that my folks had brought the dolls' house downstairs to a more useful and accessible location, and got their hands on some wooden windows for the dolls' house, I decided to pop over yesterday to snap a few photos and ask some questions. Upon arrival, however, I discovered my father was already hard at work, stripping the paper from the roof...

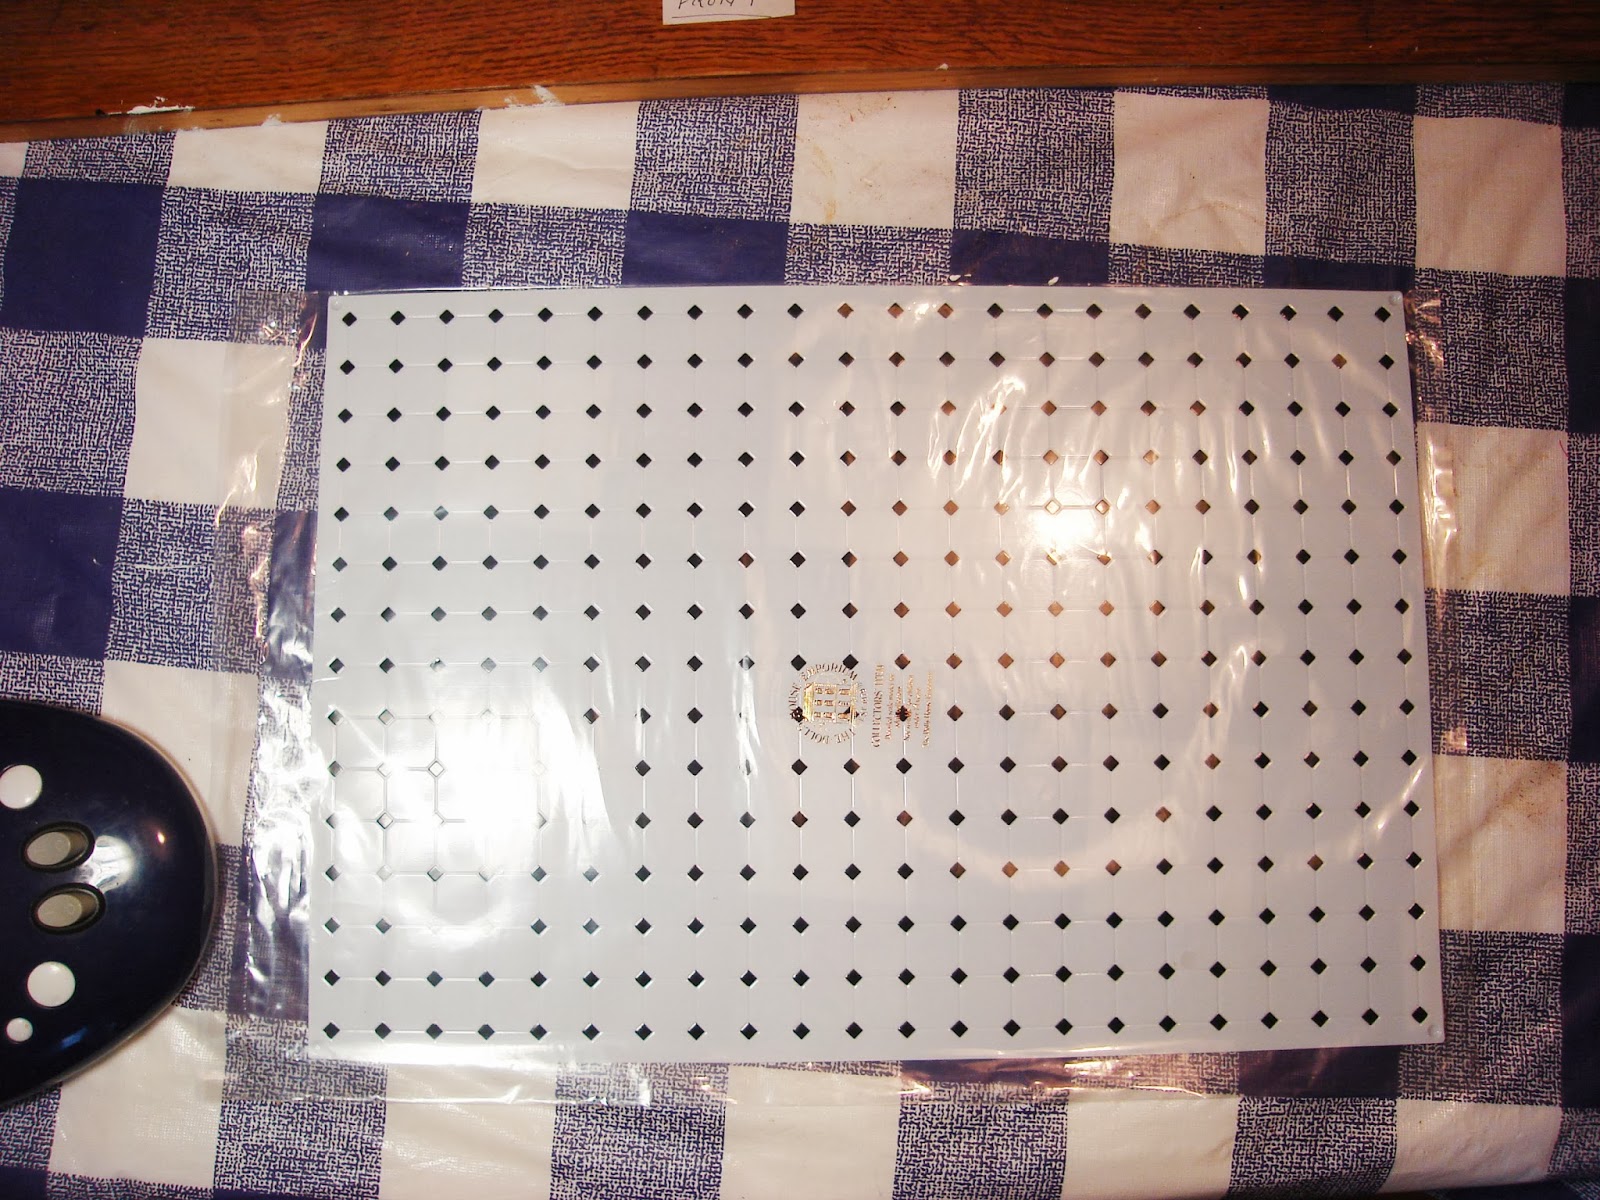
We spoke briefly about the decorating options, and how best to make use of the material and templates for creating brick and roof tile effects. The supplied templates remind me strangely of the keyboard overlays we had for our rubber-keyed ZX Spectrum, are of a size that they don't actually fit any of the papered 'wall' areas of the house - they're too long for the side quarters and too short for the longer front door - so we'll have to trim them down and do lots of matching. The idea is that you stick them in place with a temporary spray glue (which cannot be sold online as it can't be put in the post!), plaster on the brick/roof tile compound mixed with water, wait for it to dry, then peel it off and do the next section. It's likely to be a rather laborious process... and, just to make it even more laborious (while hopefully improving the end result), I suggested that we might fill out the exterior walls with the 'sandstone' compound so that they're flush with the black-painted frame, giving us a background for the brick pattern which would look like cement... though we may end up just using a matte paint to fill in the lines. A larger template is favoured for the roof, to minimise all the fiddling and matching, so we may have to keep looking...

The general consensus seems to be that painting the interior is preferable to repapering. One room seemed to be in a fit state to leave as-is, until a closer inspection revealed that the four screws holding the wall in place were visible through holes in the paper.

This revelation led to the further revelation that, where there are electrical fittings, such as the switches, the floors and walls are screwed in place. This is both exciting and useful, and it also showed that my father was more sensible than even he'd expected during the original construction project, 30-ish years ago. He'd also forgotten about the larger rods of wood he'd used to separate the floors and ceilings, and into which they're screwed. Many of his darker predictions about the difficulty of this refurbishment came from the belief that everything was glued together, so taking it apart would result in some breakage. The use of screws almost everywhere is very good news.

While talking about painting, we discussed the specifics of the staircase, which is actually a pretty brilliant piece of construction. The stairs themselves are cut from a single piece of wood, and there's a full bannister running up all the way to the landing, where it meets a safety rail - because you don't want your dolls falling down the stairs, do you? After joking about carpeting the staircase and adding little brass bits to keep the carpet in place, my father asked if I fancied the prospect of painting the staircase - the impression I got was that he wasn't especially keen to do it himself. After a closer examination, I accepted the challenge, adding only that it might be a bit easier if the ceiling/floor could come out... But I reckon it's perfectly doable even if the house remains intact throughout the painting phase.

My mother suggested that the gaps between the ceilings/floors should be covered over, as a certain four-year-old has a habit of 'inserting things into other things', her nose being the currently-favoured recipient of things. Kids, eh?

But I mentioned windows, didn't I?

Whereas there was a special offer on doors when my mother ordered four earlier in the month, there was no such offer on windows, so more caution has been exercised in this case. We currently have a pair of 'single' windows and a single 'double' window, just to see how they might fit, and to ascertain the potential usefulness of any properly-scaled items we might buy in the future. The windows aren't precisely the same type and, while I suspect the 'single' type would be sufficient for all the side windows, the existing holes are too wide... so either we'd need to fill them in, or go with larger windows.

The fact that the 'double' windows are 9-pane, versus the 4-pane 'single' means they don't quite work together, but other options are available or, failing that, we may be able to custom-make something suitable. Even if it's just a case of knocking out parts of the frame to make the 'doubles' into 2-pane windows (one from 6 panes, the other from the remaining 3, either horizontally or vertically), it shouldn't be too problematic.

By the time I left, all but one end of the roof had been stripped of paper... though whether this means we get to work on 'tiling' as soon as it's all stripped, or wait until the project is nearing completion, only time will tell...

For the most part, I think we're all feeling quite positive about this project still, though the expense of all the parts - eighteen windows, just for starters - is cause for some concern, and it's entirely possible that we'll end up filling in the eight side windows. They are something of an extravagance, but I reckon they really add to the place...

The viability - and wisdom - of allowing the roof to open was also discussed briefly... On the one hand, it gives us the option of another room/storage area... on the other hand, it's going to have a moody four year old playing with it (possibly five year old, before we're finished!), which could lead to slamming the roof, or slamming her fingers in the roof, or yanking the roof off its hinges, or God knows what other shenanigans. The same could be said for the hinged front and back walls of the house, so watch this space... There's not much more planning going into this refurbishment project than there was for the original build!

Wednesday 11 September 2013

Adding Texture...

The outside of the dolls' house comes up for discussion just as often as the inside. Right at the start, I suggested that we replace the 'roof tile'-patterned paper on the roof with some kind of proper tiling (most likely plastic sheets of ready-molded tiles). By and large, the preference has been simply stripping the current (peeling) paper, inside and out, and replacing it with more of the same, though I've often wondered if painting (at least for the interior) might be the better option.

More recently, however, my mother has found materials available on the interwebs which are mixed with water and applied to exterior walls via a stencil to give a realistic brick effect. How something like this will work with the 'framed' exterior walls of this dolls' house remains to be seen... but it certainly has potential. We may need to give it an undercoat of some kind to represent the cement between the bricks. A similar kind of thing is available for stencilling roof tiles, too... and that certainly beats faffing around with blocks, strips or individual tiles.

Plus, on the whole, they all look like better options than gluing anything to the external walls, since even the best glue isn't foolproof or everlasting... and, in the hands of a four-year-old, things glued-on have an amazing knack for coming loose...

Not sure if this is the particular website my mother was looking at, but here are examples of the exterior finishes...

Thursday 5 September 2013

Considering Doors

Not much of an update, but news all the same: in between domestic disasters of a slightly larger scale, my folks have been looking into doors for the dolls' house.

With some web-searching, they found Minimum World, 'The Online Dolls House Superstore', who had some kind of special offer on doors, so they ordered a set of 1:12 scale Streets Ahead "Collector's Item" wooden dolls' house doors.


The dolls' house wasn't built to any particular scale - and certainly isn't 1:12, as it turns out. Straight out of the packaging, the doors go right up to the ceiling on the ground floor (18.1cm/7.1" room height), and are about an inch too tall on the upper floor (16.1cm/6.3" room height) - but the more elaborate 'front door' could be made to work if cut down slightly. Such trimming would be tricky, but by no means impossible, due to the way the door is pinned into the frame.


Alternatively, now we've seen how they work, my father might end up making something at a more suitable size, and attaching them with miniature hinges. There was some discussion about the relative scale of hinges, with my father of the opinion that the smallest available hinges would be too large for the dolls' house, and me of the opinion that it's a dolls' house, and should be viewed as if through the eyes of a child, who wouldn't notice or care about such points of accuracy and authenticity as long as the doors open and close. I think this is one of those times we're going to agree to disagree until we have time to experiment...

Also, the question of interior doors was posed. Sure, having them would make the house even more realistic... but they'd be a bit of an extravagance and could actually have a negative impact on play, since a fairly large area of each room would need to be kept clear to allow the doors to swing, and an open door would obscure a good chunk of each room.

Whatever happens, the new doors (and windows) need to be larger than the tiny plastic things that were originally installed!

Thursday 8 August 2013

Humble Beginnings

OK, obviously, this isn't a project being started from scratch. The structure itself is still sound and would only require relatively minor alterations if we end up converting the loft. Still, it's as well to record as much as possible of the state it's in before any of the refurbishment begins...


The windows were only glued in place, on the outside...
some of them didn't stick very well, but only one
has fallen off


The switches are embedded in either the ceilings or
the walls, with the wiring tucked away


Three additional power points in the lounge, for a TV,
an additional lamp... and something else...
A rare bit of exposed wiring...
Chances are, this will be covered over
before the refurbishment is finished


Of course, after 30 years in storage,
there had to be at least one cobweb


The transformer sits in a box screwed to the base here
The wiring from the loft gets fed down to the base,
into this convenient groove...
...and this plugs into the transformer,
which is then plugged into the mains